How to Assemble Wood Picture Frames Step by step instructions for assembling a wood picture frame
Items Used in Assembly
Guide Or watch our video guide below
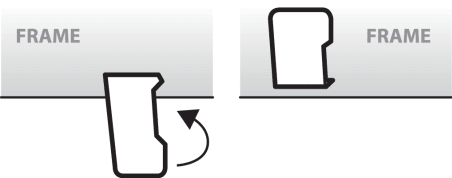
Bend the points
Bend the points on the back of the frame up.
Remove components
Remove the glazing, mat, and backboard from the frame.
Mount picture
Mount the picture to the mat or backboard with acid free hinging tissue or tape. We recommend the picture be mounted at just 2 or 3 (panoramic) points along the top. The picture and the mat or backboard will not expand and contract equally through temperature and humidity changes. This may cause waves to form in the picture if it is affixed too securely to the backboard or mat.
Remove acrylic coating
Remove acrylic coating. Make sure your work area is clean and free of dust. Static may build up on the glazing causing it to attract dust and other loose debris. We leave the protective coating on during shipment to ensure the glazing arrives in perfect condition.
Plastic covering should peel right off. Paper covering comes off more easily by rolling it off using a cardboard tube. Learn more in our guide.
Assemble
Insert the glazing, mat, and backboard back into the frame. Bend the points on the back of the picture frame back down against the mount board so the frame contents are held securely in place.
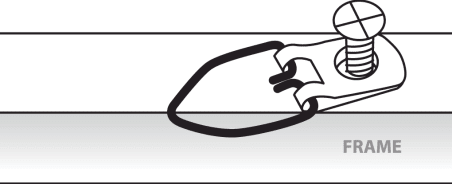
Attach hangers
Using a Philips head screw driver, mount the strap hangers to the back of the frame. They should be located about one third of the height of the frame from the top.
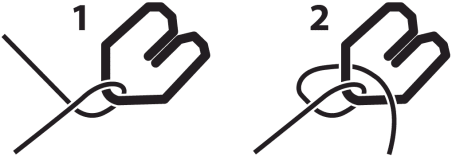
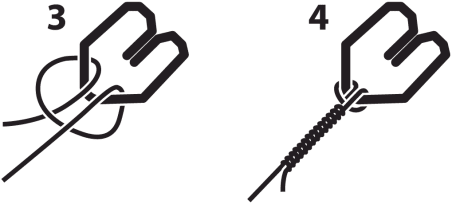
Attach hanging wire
Attach the hanging wire to the hangers and tie it off.
Wall bumpers
Attach the wall bumpers to the two lower corners of the frame.
Recycle your packaging
Once assembly is complete you can recycle the packaging including the cardboard, shrink wrap, white mask on sheets of acrylic, green eco bubble wrap and wrapping film(tape excluded).
Display
Hang your beautiful artwork and enjoy!